One bad day

Anger

For those of you who may not know, I have a part-time gig coaching cheerleading and gymnastics at various elementary schools across the East Valley. It’s been a great experience for me as an aspiring elementary school teacher. The students vary from K5 to 6th grade. This is especially helpful since I don’t really know what grade I want to teach.

I learned a very tough lesson the other day, but I’m not even sure if I can break it down into a simple moral. The result didn’t cost me my contract with the whole company, but I no longer teach at that particular school. Here’s what happened:

My Version

I was 15 minutes late for a gymnastics class but called to let them know. I asked if someone could open the storage closet where the mats were, the kids knew what to do. I was told that she didn’t think it was a good idea having these little kids carry those big mats. I was skeptic and slightly frustrated but said okay. She said that someone would wait with the kids though no problem.

One thing you should know is that I despise being late, especially for work or some similar responsibility. I tend to only focus on catching up, which in this case was a very bad thing.

I arrived at the school and headed straight for the closet where the mats were stored. A few of the students followed to help like they always do. I was called by the teacher that had been waiting, and she stated again that the students really shouldn’t help with the mats. I’m pretty sure I responded quickly and continued to the closet. I brought the heavy mats out two at a time, up a short flight of stairs, and tossed them down to be unfolded. Students asked to get water or go to the bathroom so I made an announcement to go now while I got set up. From that point, class continued normally although I hurried through the review and beginning warm ups.

Her Version

I was contacted that night by my boss about what happened at the school that afternoon. I explained much like I did above. She let me know that I was later than I thought and that it was the principal of the school that waited with the kids. I thought that was the end of it, but I got a call the day before I was supposed to teach that class again with worse news.

Apparently, the principal did not hear my reply when she told me about the kids not helping with the mats. I thought that I had said something but maybe not. I wasn’t concerned with appearances, just with making up for lost time. The principal also thought that I threw the mats down angrily. After the first call (but before my boss had a sit down with someone from the school system), the rules were that the children were not to touch the mats at all. I was also reminded that any time after the bell rang was late. After the second phone call, I was no longer teaching that class.

My Mistakes

I agree that I did not handle the situation very well. Instead of addressing the teacher that was waiting by apologizing for being late or thanking her for waiting, I blew right past to the storage closet. I also didn’t think about appearances. I’m sure I appeared quite rude when I’m really not.

Lessons Learned

I’ve known that sometimes I really need to slow down. This incident just reinforced that goal. To me, I was just in a rush. To her, I was rude and angry.

I was also reminded that appearances and first impressions are still very important. I no longer can work at that school (which is truly heartbreaking for me) because I made a bad impression on one bad day.

I can only hope that the impression I made on the kids and some parents leaves a better account of how I really am.
 

A Christmas Carol

A Christmas Carol

Everyone knows the story of A Christmas Carol by Charles Dickens. It’s been made and remade probably more than any other story that’s been turned into film, but have you ever read it?

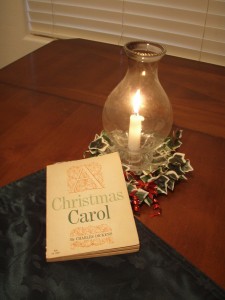
Ever since high school English, I’ve had my issues with Mr. Dickens, but I’m trying (again) this year to read A Christmas Carol in its entirety before Christmas Day.

My favorite movie version of A Christmas Carol is from The Muppets. I have gotten a little into the book and was really surprised how much I could quote because of how many times I’ve seen that movie.

My major reason for stating my intentions is for a little conversation and a little accountability. You should be able to keep up with what I’ve read through Readernaut. Now that I’ve stated it, I plan on keeping up with it!

I’d love to see how many people have read the book. Which movie version is your favorite? Please, let me know in the comments below or follow me on twitter here.

Happy Holidays!


Christmas Craft Day ’09, A Success

I want to start with a huge THANK YOU to everyone who came out to this year’s Christmas craft day. I also wanted to thank the many different people and groups who retweeted the message and spread the word.

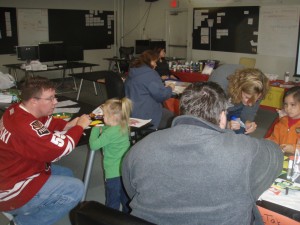
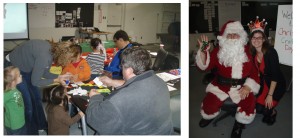
I’m happy to say that we had more than twenty people come out including a surprise visit from Santa Clause!

CCD 1

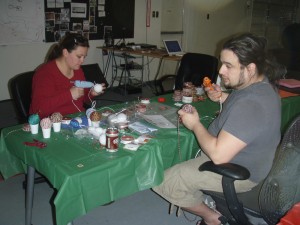
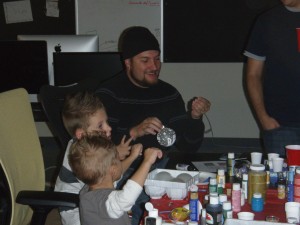
There were supplies to make cards, boxes, paper snowflakes, magnets, snowman poop, styrofoam ornaments, snow globes, gift bags, penguins, partially eaten gingerbread men, and glass ornaments. It was great to see the creativity flow again this year!

CCD 2

I would love to get some feedback from those of you that attended! What was good? Bad? What did you and/or your kids enjoy? Is there anything you’d change or something you’d miss if it didn’t come back? Let me hear it! Good or bad, comment below or follow me on Twitter here.

For those of you interested in donating here is the button one last time. Please use the email sharon [dot] bowerman [at] gmail [dot] com.

Here are a few more pictures from the day:

CCD Crafting 2

CCD Crafting 3

CCD Crafting 4

Happy Holidays!


Extra Gift Ideas

The Christmas Craft Day is THIS SATURDAY on December 5 at Gangplank HQ from 10 am to 4 pm. If you’re interested in attending, please RSVP on Facebook. This is most likely the final tutorial for the craft day but look for a recap on Tuesday the 8th. This is a free community event but donations are welcome day of or through PayPal at the bottom of the post.

Paper Snowflakes

Snowflake_04Special Gift

This is probably the most difficult craft to master but one that everyone wants to know how to do. To make a paper snowflake, you need a square piece of paper no smaller than 5×5, scissors, wax paper, and an iron.

  1. Cut paper into a square with sides no smaller than 5″
  2. Fold a square in half diagonally to form a triangle
  3. Fold the triangle in half
  4. Fold that triangle into thirds, one side toward the front, the other to the back.
  5. Trim the extra paper off the bottom of the triangle.
  6. All around the outside of the triangle cut out notches, diamonds, squares, narrow slits, and triangles. Make lots of cuts for a lacy snowflake, leaving some folds on both sides intact to keep the snowflake in one piece.
  7. Unfold your triangle to reveal a six-sided snowflake!
  8. Use the wax paper and iron to make your snowflake nice and stiff. Sandwich your snowflake between a piece of paper and a piece of waxed paper. Lay another sheet of paper on top of the waxed paper and iron on low heat to melt the wax onto your snowflake.
  9. Peel off the wax paper right away, while it is still warm.
PS SxS

Steps 3 - 7

Voila! You should have a nice paper snowflake to hang or give. It definitely takes lots of practice (for me at least) to get it really good.

Magnet Gift

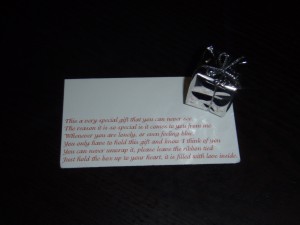
This is a very sweet, simple gift to put in a stocking or give to close friends. You’ll need business card printer paper, business card magnets (both available at any office supply store), small decorative gift boxes, and the poem below.

This is a very special gift that you can never see. The reason it is so special is it comes to you from me. Whenever you are lonely, or even feeling blue, you only have to hold this gift and know I think of you. You can never unwrap it, please leave the ribbon tied, just hold the box up to your heart, it is filled with love inside.

Print the poem on business cards, formatted to fit the poem and little gift. Stick the business cards to the magnets and glue the miniature gift box onto the card.

Magnet

Snowman Poop

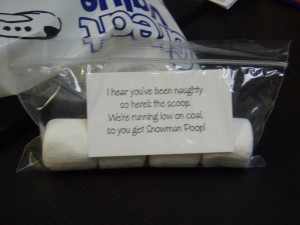
The last easy gift idea I have requires snack size baggies, marshmallows, and another clever poem.

I hear you’ve been naughty so here’s the scoop: We’re running low on coal so you get snowman poop!

I suggest printing that poem on business cards as well. There are lots of fun fonts to use and the size fits into the snack bag easily.

Print the poem; add it and a few large marshmallows to the snack bag and you’re done!

Snowman Poop

I do have the two poems formatted for Avery 5371 paper if anyone would like the files. I had trouble attaching them to the site but am more than willing to save you some time and work by emailing them to you. Feel free to leave a comment below or follow me on twitter here.

I hope that all of these ideas make the holidays easier and more fun for you and your family!

Happy Holidays!


Snow Globes

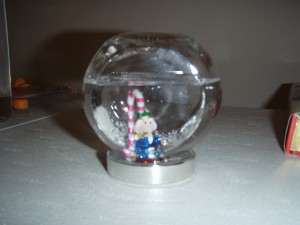
Snow globe

As you can see, I didn't add enough baby oil!

Snow Globes are probably my favorite Christmas craft although they can be a bit tricky. This is more from my Christmas Craft Day series. The event will be held on Saturday, December 5th at Gangplank HQ from 10 am to 4 pm. Please, RSVP on Facebook. If you’d like to help fund this free community event, please click the donate button at the bottom.

Supplies:

  • Small glass jar with lid
  • 1 eggshell
  • small plastic re-sealable bag
  • rolling pin
  • strong water-proof glue
  • small plastic toys or ornaments
  • baby oil
  • glitter
  • pie tin

Step by Step:

  1. Wash and dry the jar inside and out.
  2. Wash and dry the eggshell. Place in the plastic bag, pushing as much air as possible out of the bag before sealing it. Crush the eggshell with the rolling pin until it is as fine as sugar.
  3. Glue toys to the inside of the jar lid, making sure finished scene will fit inside closed jar. Sprinkle a little bit of eggshell over any exposed glue. Let dry.
  4. Fill the jar three-fourths full with baby oil. Add the crushed eggshell and some glitter to create sparkle in your snow. Allow the snow to settle at the bottom of the jar.
  5. Place the jar on a pie tin to catch any overflow of the oil.
  6. Put beads of glue on the threads of the lid and carefully lower ornaments into the oil. Screw the lid on tight.
  7. Allow five minutes for the glue to set, and then give it a shake!

This craft takes quite a bit of patience and some creative thinking. You absolutely have to let the glue dry completely before putting your scene in the oil! It was also tough to find miniature ornaments with flat bottoms that would be easy to glue to a lid. I don’t have kids but I think if a child had a small plastic toy to stick inside, that would make a great non-Christmas snow or glitter globe. I’m not sure if sand might work instead of the eggshell but wouldn’t it be fun to try?

Have you ever tried to make a snow globe? How did it turn out? I’d love to hear your ideas or experiences so leave a comment below or follow me on twitter here.

Happy Holidays!


Advent Calendar

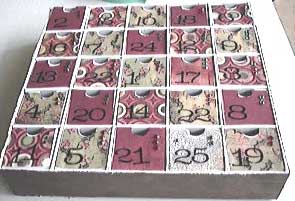
3-D Advent Calendar

Photo by campbelj45ca

Most of the design blogs that I follow are getting into the holiday spirit. On a few of them, I’ve seen different ideas for advent calendars. I’ve always loved them and thought I’d add to the ideas out there. This is in continuance of my Christmas Craft Day related posts. CCD ’09 will be held on Saturday, December 5th at Gangplank HQ from 10 am to 4 pm. Please, RSVP on Facebook. If you’d like to help fund this free community event, please click the donate button at the bottom.

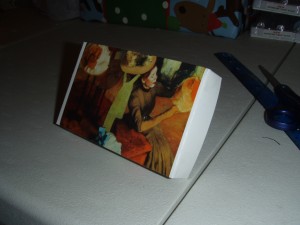
My advent calendar idea comes from recycled Christmas cards. I found a couple of ways to turn old Christmas cards into small gift boxes. These boxes aren’t useful for much more than jewelry, sweets, or personal messages; but I think those are great things to put inside an advent calendar.

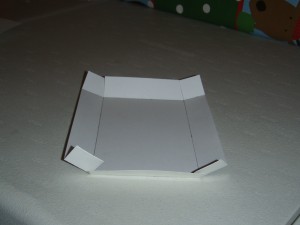
I found a great how to on Instructables but you need a pro account to view the instructions in a less annoying manner. The basic idea is to tear the card at the fold so you have the picture of the card as the lid and the words of the card as the base. Trim the back of the card by just an eighth of an inch on each side so the two halves fit together well as a box. You can change the dimensions of your gift box by deciding how deep you want the sides. If you only need a shallow box say for a necklace or gift card, fold about a half inch on each side. It’s important to measure so your base and lid are the same depth. After that, cut on the folds of the shorter side up to the point where it meets the fold of the longer side. Do this in every corner so you have four small cuts.

Box Folds

At this point, fold the single long flap over the two smaller flaps and tape the corners.

Card lid, finished

I estimated on my first card so the lid and base did not fit together like they should have. To turn it into an advent calendar have numbered stamps, stickers, or rub ons and be creative!

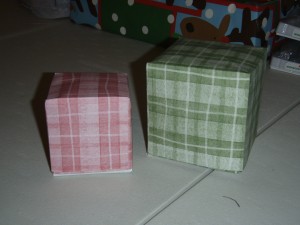
Some other ideas for this technique is to make ornament boxes. I made a couple from 12×12 scrapbook paper. I wanted the box to be 3x3x3 so I cut the total paper to be 9×9 and measured 3″ from every side. Don’t forget to make the base a tad bit smaller so you’re not trying to force them together. You can use the full 12×12 paper to make 4×4 boxes or get even smaller.

Ornament Boxes

Do you have ideas on how to recycle greeting cards? Or maybe other simple treats to put in an advent calendar? I’d love to hear about them. Comment below or follow me on twitter here.

Happy Holidays!


Tweetsgiving

Photo by Rachel from Cupcakes Take the Cake

Photo by Rachel from Cupcakes Take the Cake

This is the second time my husband and I will be celebrating Thanksgiving with friends and calling it “Tweetsgiving.” It seems that this year it is a much more organized event. According to the website, “TweetsGiving is a global celebration that aims to change the world through the power of gratitude.” Epic Change is the charity that is collecting donations for a school in Arusha, Tanzania. There are four steps that are asked of participants: share, give, spread, and follow.

I tweeted: “This #tweetsgiving, I appreciate my friends near and far who are always just a phone call away.” That’s especially true this time of year. Being in Phoenix, the closest family is 1,000 miles away but thanks to Alexander Graham Bell, I can call my mother-in-law and ask (yet again) the best way to cook a turkey and make delicious gravy, or I can call up my mom and ask, “how much pineapple juice is in homebrew again?” As cliche as it might be, I really am thankful for the technology I have regular and easy access to.

I also want to mention my dogs, Lucas and Lexi. I grew up without pets but can not imagine a very happy life without them! I really think only another pet (especially dog) owner can relate, but my pups always brighten my day even when they’re hyper and barking and running around like crazy! The joy they bring and stress they reduce definitely makes my life better!

I hope that you have a wonderful holiday sharing a meal and gratitude with people you love. I know I will.


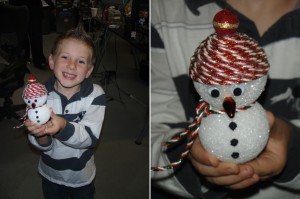
Styrofoam Ornament

This is continuing the series of tips, tricks, ideas, and how tos relating to this year’s Christmas Craft Day. It will be held on Saturday, December 5th at Gangplank HQ from 10 am to 4 pm. Please, RSVP on Facebook. If you’d like to help fund this free community event, please click the donate button at the bottom.

The styrofoam ornament is one of the quickest and easiest of ornaments that I’ve done. To learn how to make your own you can either watch the eleven minute video or follow the steps listed.

Supplies

  • Styrofoam Ball (any size)
  • Cord-type ribbon (at least two spools for 2.5″ size ball)
  • Thinner ribbon for hanging loop
  • Hot glue
  • Straight Pin
  • Scissors

Video

Step by Step

Select the size ornament you want to create as well as your favorite cording. You will most likely need two spools so pick the same or matching colors.

Start with a dot of hot glue and poke in a loop of string so you can hang your ornament. This is now the top.

As close to the top as you possible, start with another dot of glue and a strait pin to hold the beginning of the cord in place.

You will spiral the cord around the ball and glue as you go. Make sure not to use too much because the styrofoam might melt and the glue would overflow. You do need to make sure the cord is secure.

Wrap and glue, wrap and glue.

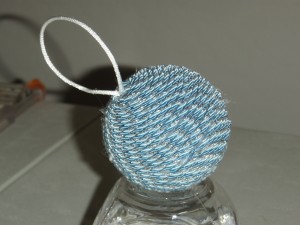
Your ornament should look something like this:

Styrofoam Ornament

There are plenty of ideas to make each ornament better and unique. Have you tried this? How did it turn out? I’d love to know! Please, leave a comment below or follow me on twitter here.


Happy Holidays!


Glass Ornament. How I got creative with a mistake.

This is the beginning of a series of tips, tricks, ideas, and how tos relating to this year’s Christmas Craft Day. It will be held on Saturday, December 5th at Gangplank HQ from 10 am to 4 pm. Please, RSVP on Facebook. If you’d like to help fund this free community event, please click the donate button at the bottom.

The Goal

I started with a large glass ornament with the intention of making a snowman family from my handprint so I could end up with something like this:

The Mistake

What actually happened, however, was the paint dried too quickly on my hand and did not leave a very good print. I painted my hand again and tried to lay my second try directly over my first. I hope you can imagine because it did not look very good.

The Fix

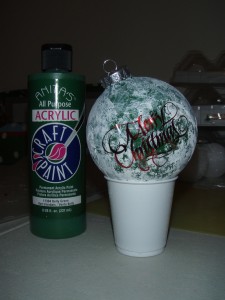
I was a bit frustrated so I set it aside to think about how I could salvage this ornament. I came back to it with more white paint and a 1/4 inch size paint brush. I generously applied paint to the brush and smooshed it against the glass ornament over and over again until the outside of the glass was almost covered.

Because there were still parts of glass visible, I thought it would look great with a dark, solid color as background. I went with Kelly Green.

To finish off the ornament, I took a couple of large red stickers that say “Merry Christmas” and applied them to the outside on opposite sides of the ball.

Result

I love how this mistake turned out because the white on the outside looks a bit like the spray snow for windows and incorporates red, green, and a merry Christmas.

Do you craft? Have you tried ornaments this year? Any creative ways to turn mistakes into something great? Please, share with me in the comments or follow me on twitter here.

Happy Holidays!


Christmas Craft Day 2009

I have less time and less money, but I really want to make this year’s Christmas Craft Day better! To help do that, I’ll be posting pictures and tutorials of all the crafts available at this year’s event. If you can’t come and socialize, you’ll at least be able to make the things that people will *hopefully* be talking about.

Ornament_11

On the list:
Glass ornaments. How to get creative with mistakes.
Styrofoam ornaments. Careful that glue is hot!
Paper boxes. Reuse Christmas cards.
Paper snowflakes. So that’s how they do it!
Snow globes. My very own wintery scene.
Quick gift ideas because there are so many we love.

The details of the craft day can be found on Facebook. It lets you RSVP and suggests items to bring to help with the event. Future posts will include even more ideas of items to bring or to experiment with at home. What you really need to know is that it is on Saturday, December 5th from 10 am to 4 pm at Gangplank HQ. The address is 325 E Elliot Road in Chandler, Arizona.

I would like this event to be more for adults although it is definitely kid friendly. My goals are for people to learn creative ways to decorate their homes or make gifts and have fun while doing it. It’s also a way to build community through creativity.

If you’d like to help, please donate. I hope to see you there! Happy holidays.