- Starting Supplies
- 4 1/4 by 5 1/2″ cards
- Inside lines
- Filed edges
- Ink, mat, and round corners
- Final front
- Final inside
A preservice teacher’s corner of the web.
Sometimes people don’t get enough credit. If there’s someone you know who just had something good happen, celebrate with them! Here’s a card to help you do just that.
Inspiration:
It was very easy to put this card together, but the extra effort of hand-cutting the butterflies makes it that much nicer!
I was looking for inspiration today and pulled out the instructions from the January SEI kit. I decided to create this card from different scraps.
I took a piece of neutral colored cardstock that was ready, scored it, and folded it.
I then took nine different papers as recommended and cut them into 1″ by 6 1/2″ strips.
Next, I pulled out my edging scissors and got to trimming.
After that, I simply decided order and started gluing.
The last step was a little embellishment with buttons and ribbons.
I have now found another great way to use scraps.
Today has been pretty crazy so I decided to go back to one of my older SEI kits and do another project from it. I pulled out the Spring 2010 “In the treetops” collection. I had made all the cards so I decided to make the mini album. The kit refers to the album as “things I love.” I thought that was perfect with Valentines day and an anniversary coming up. Today I just followed the directions and put the album together. I’ll make it my own later.
Technical specs: the kit recommends sewing the album together. I decided to give hand-binding a try. I used my paper piercer to make guide holes every 1/2” on all the pages. As I sewed using hemp, I pierced the holes again making them large enough for my string. I sewed in and out in one direction, looped over the top, and sewed in and out on the opposite direction. I secured the last outside loop with a double knot. I highly recommend keeping your paper piercer handy as well as scissors to cut off the tip when the string gets too loose.
Today’s Handmade by Shay is really handmade by Rachel. I bought a comp book for my little sister-in-law and promised to help her make it over. We finally got some time to do that together. I had created an altered book at my first scrapbooking convention back in ’07 and still had the sketches for different ideas. Rachel picked a sketch and a color scheme. I trimmed the papers for her and cut out the flowers; she did the rest. Here’s the final product front and back. All in all, including cleanup, it only took about 30 minutes. I know she loves it, and I’m glad!
Here’s a card for those of you who may not celebrate valentine’s day or want to celebrate every day. It’s pretty rough since I designed it on the fly. I made a Spirograph background in three shades of blue on blue cardstock. I used an American Girl stencil for the lettering and vellum for the window, which was initially just going to flip up.
Here’s a variation of this sketch I’ve been featuring the last couple of days. My favorite part is that you can orient the card any way you want.
Just a reminder that any card you see on the blog or on my Flickr is available for sale. Simply contact me with your request.
Feeling less than inspired today, I decided to go through some old folders of mine where I have stored magazine articles. The inspiration came from an old “Becky’s Sketch” from Creating Keepsakes Magazine. When I saw the recommendation to use scraps, I knew exactly which paper to pull out. The paper is Cosmo Crickit’s “Togetherness” line. If you’ve seen these memory albums, the papers should look familiar. I didn’t take too many pictures today but here are the sketches:
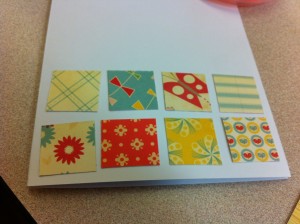
 With the grid at the bottom, I decided to start with the small scraps and cut 1×1 squares in quite a few different papers. I still had stickers leftover from the set so I pulled those out as well. I placed my squares on plain white precut cardstock and continued to lay things out until I was satisfied. I knew pretty quickly that I had enough supplies to do both sides of the sketch so you get a twofer! Here are the cards side by side so you can see how the sketch might look as a scrapbooking layout.
It’s one week before Valentine’s day so your time to take up my free valentine offer is just about up. I couldn’t let this year pass without using the great quote stamp I found last year. My process is very organic, and I tried to show that in my photos. I start with an idea and just pull out supplies to experiment with. Here are the step by step photos starting with the inspiration and finishing with my copy. Spread the love this year!